How to Customize Stardock Fences
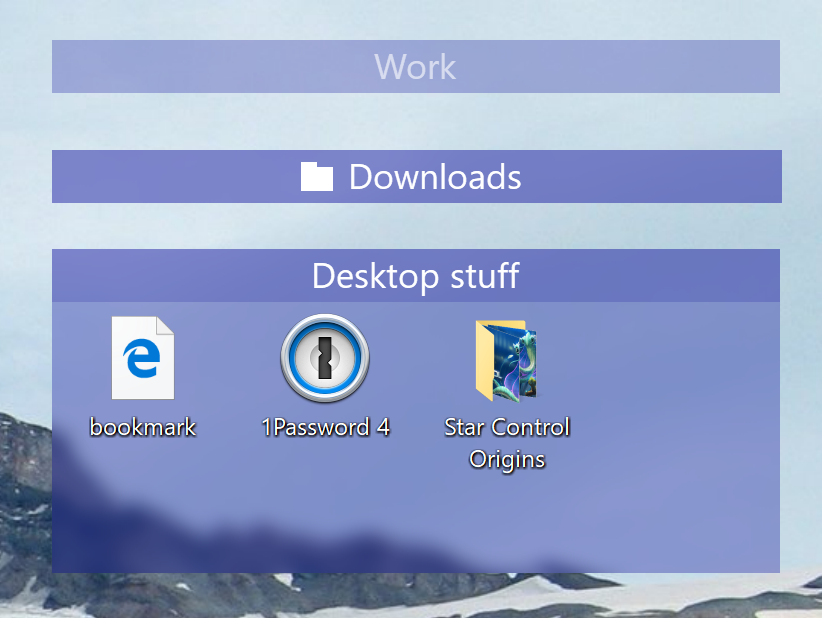
Fences is one of our most popular desktop apps for Windows! It allows you to sort and organize your icons and folders into customizable “fences” on the desktop. Some of the coolest things about Fences are the customization features you can apply to make your fences look and function how you want them to.
In this guide, I'll show you some common customizations and how you can adjust and apply them to your fences.
Adjusting color and transparency
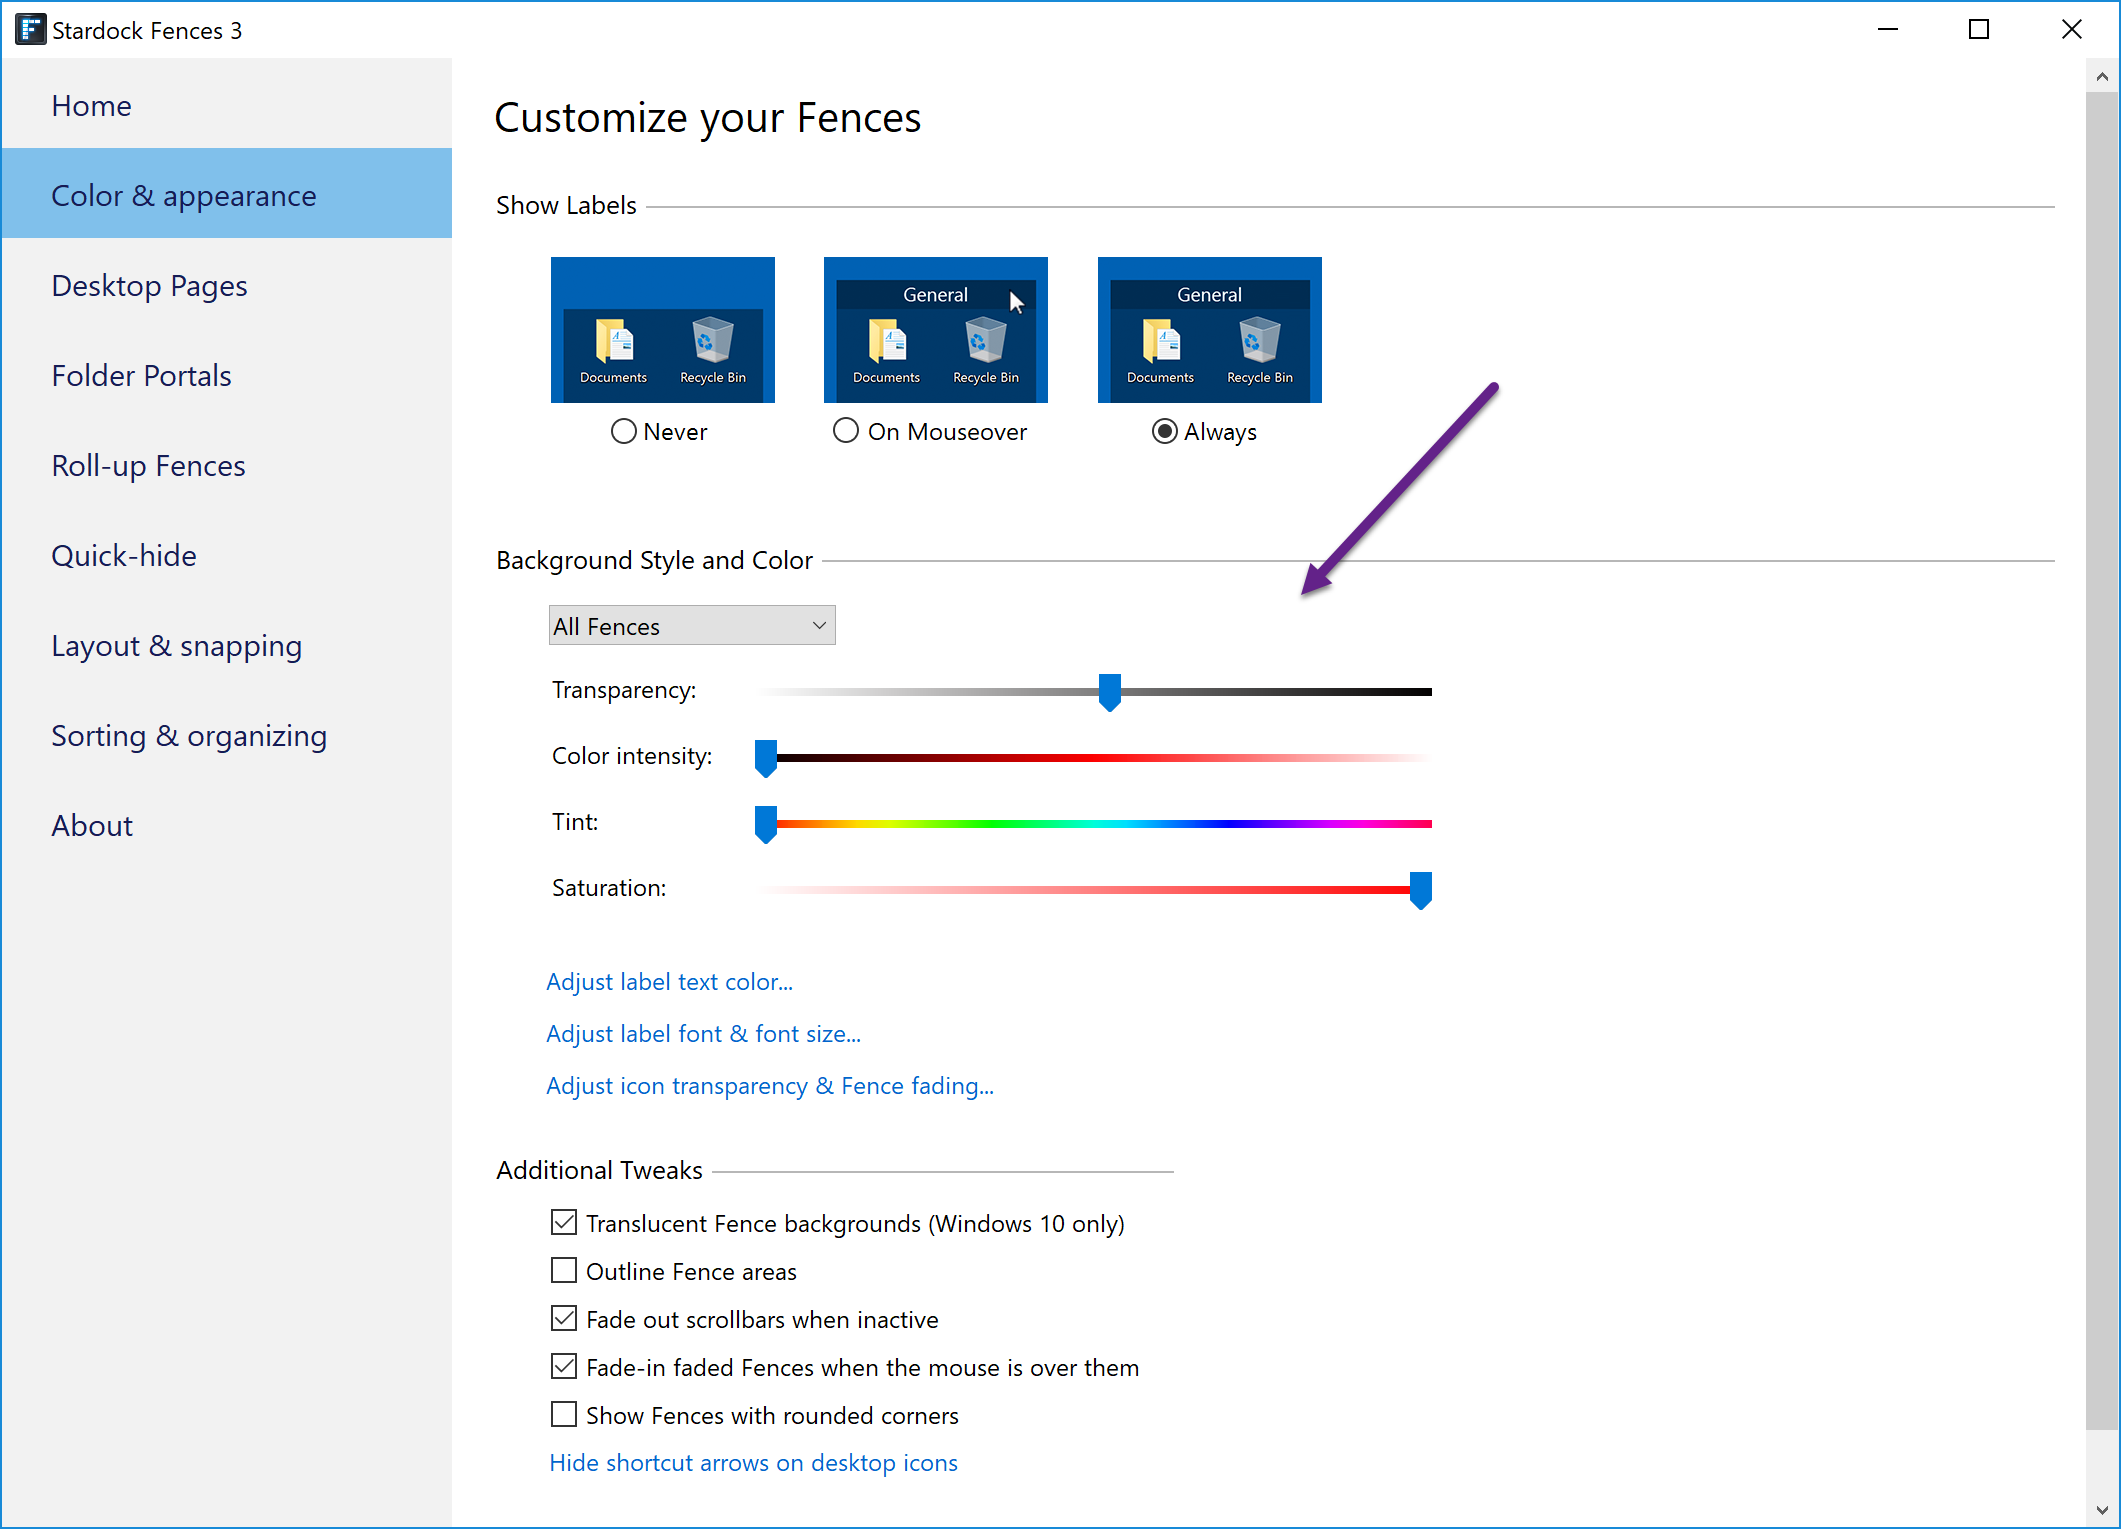
This is probably one of the most popular customization options available in Fences. Open the Fences configuration window and click the "Color & appearance" tab. Here, you will see most of the customization options you have to work with. You'll have several sliders which will allow you adjust the colors and transparency of your fences. Just use the sliders to apply the amount of transparency you want, and adjust the various coloring sliders to change the colors of the fences. You can apply these settings to all fences, or choose individual ones by selecting that option in the drop-down menu.
Changing the opacity of a fence
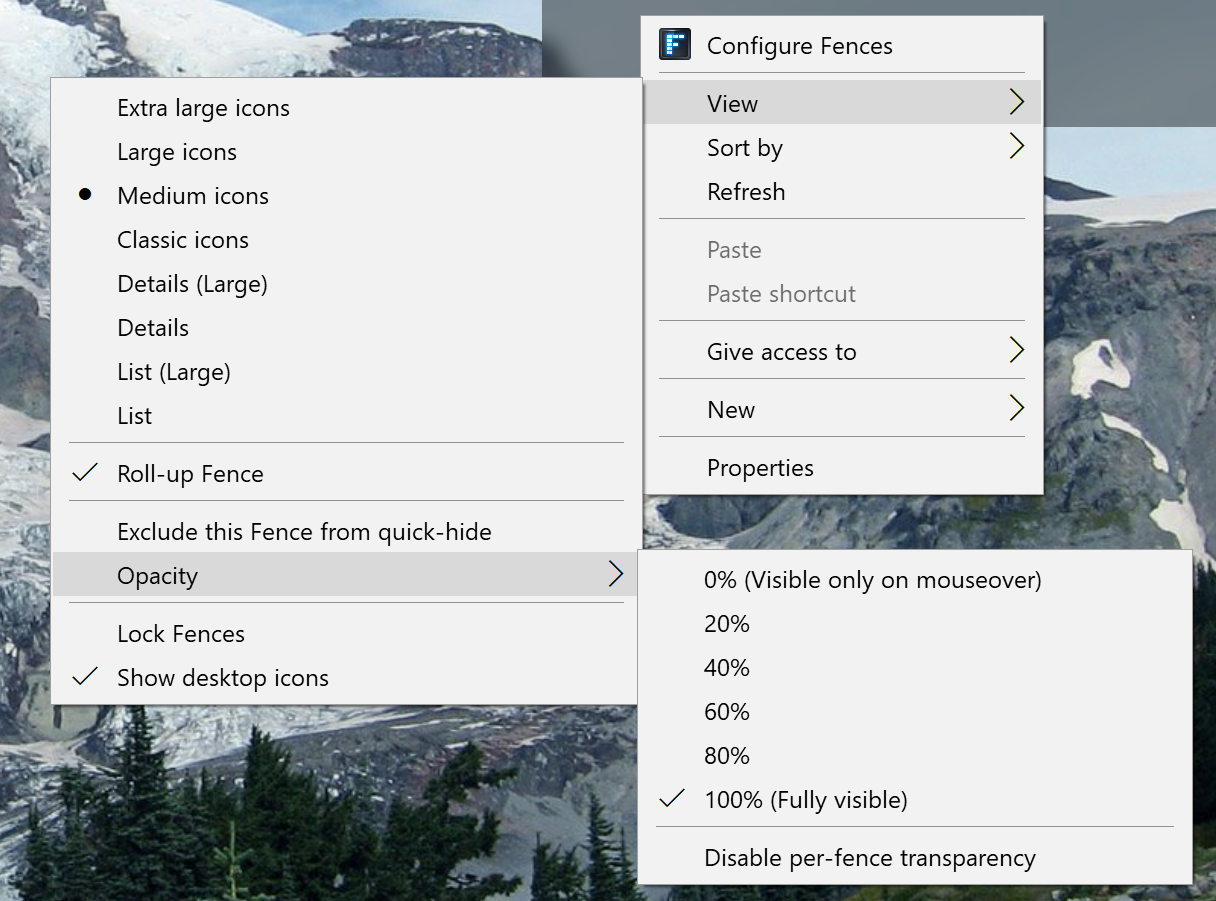
Adjusting the transparency slider in the configuration won't affect the opacity of your icons inside a fence. If you want to adjust the opacity of the fence and icons, then right-click inside a fence, select View, then Opacity, and adjust it to where you want it to be.
Re-sizing fences
When creating a new fence, you can draw the dimensions of the fence by clicking and dragging with your mouse. Some people don’t realize that you can change the dimensions of a fence just by grabbing the edge of the fence and dragging it with your mouse to resize it. While re-sizing a fence, you can also hold down the Shift key to disable snapping for a more precise placement.


